I recently bought a pair of Beard seats for my Manx and was faced with the task of installing them in my car. The Beard seats are tube steel frame seats that have excellent support and a softer ride than the typical fiberglass bucket seats. This discussion deals with attaching the Beard seats to the original VW seat rails on the mid-70 and earlier VW floor pans. The technique used here should also work for the fiberglass seats with minor modifications to the supporting frame to fit the mounts on the fiberglass shell.
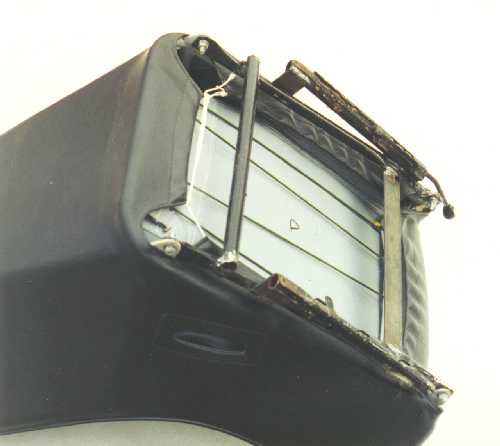
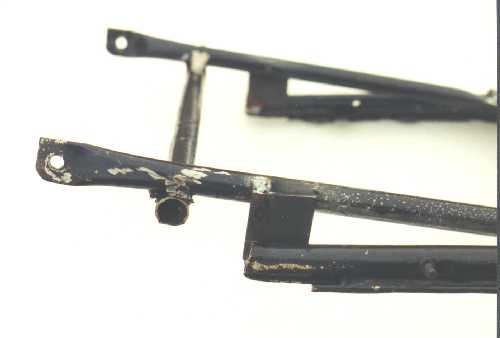
The original VW seat rails on the earlier VW floor pans consists of a pair of triangular shaped pieces of sheet metal that are welded in the factory to the sheet metal floor pan on each side of the car. The top edge of the rails have a 1/4 inch wide edge bent over 90 degrees to form a flat surface. The seats hook on to this flat surface and slide backwards and forwards over it. This low tech seat attachment mechanism is actually very sturdy and extremely inexpensive to fabricate (the “people’s car” needed to be cheap). Even though the mechanism is simple, the alignment of the sliding seat channels with respect to the seat rails is very critical. If these rails get bent even 1/8 of an inch, the seats will refuse to slide on or off the seat rails. This is the point where you get very mad and break out the sledge hammer.
The trick to using the original seat rails involves a little trickery to keep the original seat track alignment. In order to proceed you will need a pair of original VW seats that can be disassembled so that the attached seat tracks can be re-used. The seats should slide back and forth smoothly on the seat rails (a little grease on the set rails helps). Remove the seat backs and discard them as they will not be used. Remove the seat covers and springs from the seat bottoms so that only the oval shaped seat support tubing is remaining. This assembly should still be able to slide smoothly on and off the seat rails. If is doesn’t, the seat assembly can be carefully bent (the seat rails should not be bent unless they are obviously not straight) until the seat moves freely over the rails.
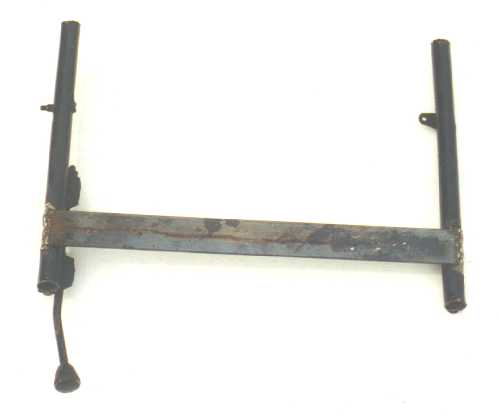
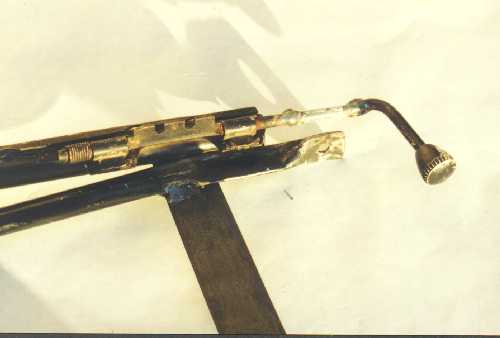
Now comes the trick. We really only need the straight seat track sections on the bottom of the seat assembly for our use on the new seats. However, if we cut them off now, it will be nearly impossible to regain the original alignment with the seat rails. So, the trick is to weld a cross piece between the two bottom seat tracks of the seat assembly before we cut them off. I used a 2 inch wide piece of 1/8 inch thick steel to make the cross piece. This piece was welded in place just above the seat adjustment mechanism (see picture).
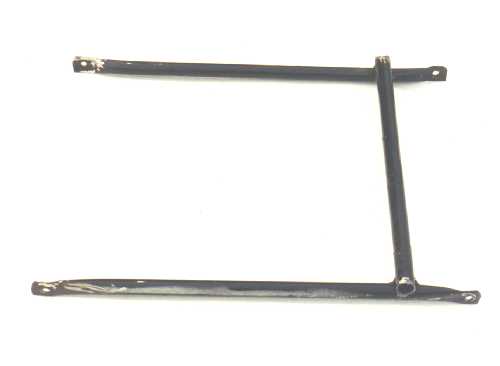
The next thing to do is make a steel tubing frame that attaches to the bottom of your seats. I used two pieces of EMT steel tubing with the ends flattened in my vice. The steel tubes are to extend from the front mounting tab of the seat to the rear mounting tab of the seat (not side to side). I drilled the flattened ends so that they can be bolted to the steel tabs on the bottom of the Beard seats. A steel tubing cross piece (this could also be 2 inch flat stock) was then welded between the two tubes about 3 inches forward of the rear mounting tabs (see picture).
We now have two assemblies - one slides on the seat rails (the seat track frame) and the other bolts to the mounting tabs on the seats (the seat support frame). They now need to be welded together. Since the seat rails on the bottom of the floor pan are triangular in shape (i.e. the front is about 2 inches higher than the rear) the two frames we just made must have a compensating angle to make the seats level.
The seat support frame must be first welded to the 2 inch flat piece that separates the two rails of the seat track frame. The seat support frame should extend about 2 inches past the front of the seat track frame (see picture).
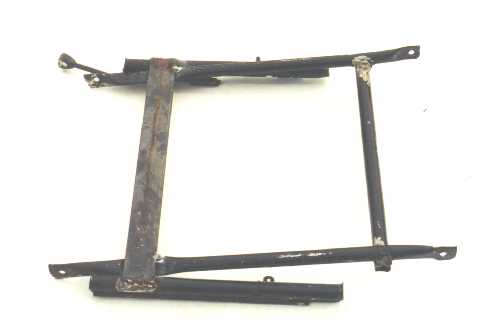
To attach the rear of the two frames together, two 2 inch square pieces of the 1/8 inch thick flat stock must be cut. These square pieces are then welded to the rear of the seat track frame and then to the seat support frame at the correct height measured earlier (see picture).
Now bolt the frame to the seats and slide the finished product on to the seat rails in the car (see picture).