
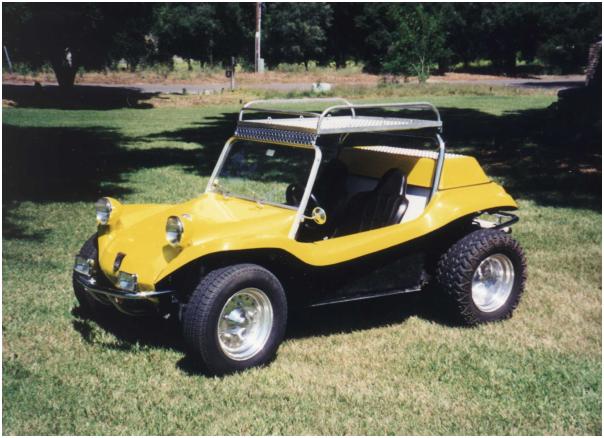
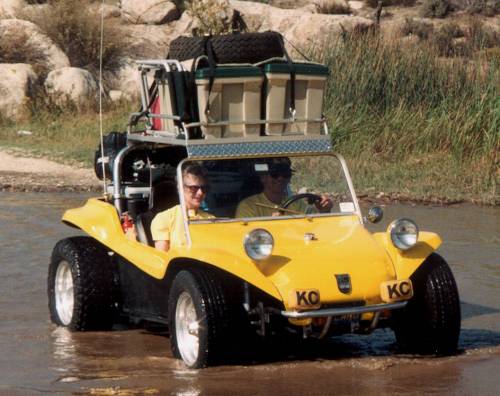
Loaded up and on my way!
I wanted a roof rack that would be strong and not too heavy. When you pile on 5 extra gallons of gasoline, 5 gallons of water, an ice chest, food and miscellaneous camping gear the weight on top can approach 250 lbs. When the going gets rough, you don't want any movement in the rack or it will cause problems at the mounting points. I also wanted a rack that looked nice, was easy to install and remove, and did not require any holes to be drilled in my recently restored buggy.
The rack I designed is made of aluminum diamond plate that is light and strong. The polished surface on the diamond plate is attractive and will take a lot of abuse. The diamond plate is formed into a 1-1/2 inch deep pan and steel tubing is bent and welded together to from the rest of the rack structure. Another piece of diamond plate is used support the rack above the buggy windshield.
The diamond plate pan is made from a 1/8" thick sheet of aluminum that is 39" wide by 45" long (or whatever the distance is from the front of your windshield to the back of the roll bar). A 1-1/2" square piece is cut from each corner so that the 1-1/2" sides can be bent up to form the pan. The aluminum will flex easily while in a sheet; however, after the sides are bent up; the resulting pan becomes very rigid. The aluminum must be bent in a metal fabrication shop with a tool called a "break". A bit of warning here: you can not do this in a manual break because the aluminum is too thick. The shop must have a hydraulic break. The shop I found charged me about $75 to cut the aluminum, bend it, and weld the resulting seams in the corners.
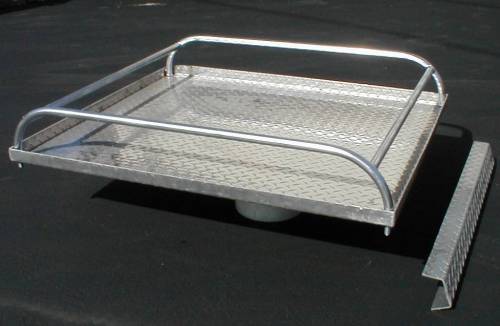
Aluminum Pan, Support Rail, and Steel Top Rack Frame
To support the pan above the windshield, a second piece of aluminum must be fabricated. This front support rail is also made from diamond plate and bent in a hydraulic break. The support rail fits snuggly into the groove that runs around the front edge of the windshield frame. The rail extends across the entire top edge of the windshield frame so that there is a wide area to support the weight. If the weight were supported at just one or two points, there would be a high probability of breaking the windshield glass. The support rail is made from a 6" wide by 36" long piece of aluminum. Two bends are then required. A one-inch wide lip is bent up 90 degrees on one side of the rail to fit into the lip of the windshield frame. A three-inch wide lip is bent up 60 degrees on the other side of the rail to support the rack that fits on top.
The attachment hardware is made from steel. The aluminum support rail is kept in the windshield groove by two small brackets. The brackets are made from 1/8" thick steel strap that is 1-1/4" wide by 3-1/4" long. The ends of the bracket are bent in opposite directions. One end (1" inch long) is bent up 90 degrees and a hole is drilled in the center to bolt to the front support rail. The other end (3/4" long) is bent down 90 degrees so that it will fit behind the windshield frame. When bolted in place, the bracket does not support any weight but will keep the support rail from coming out of the windshield frame groove. One bracket is bolted on each side of the support rail with a 5/16" inch bolt.
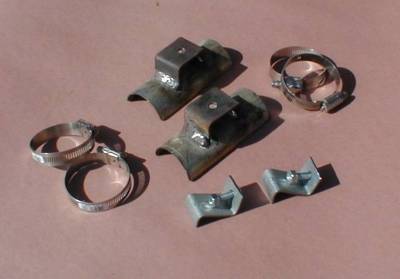
Mounting Brackets
The rear structural mounting point for the rack is the top of the roll bar. I did not want to drill any holes in the roll bar so I took Bruce Meyers advice and built two saddle brackets. These brackets are made from a piece of 2" I.D. galvanized steel pipe 5" long that has been cut lengthwise. These half round pieces of pipe then "adjusted" with a hammer so that they sit snugly on the roll bar. Each half round piece of pipe must then have a piece of 1/8" x 1-1/2" steel strap welded on the top. The steel strap is 4" long with a hole in the center for a 5/16" bolt to connect to the aluminum pan. At one inch from each end the strap is bent up 90 degrees to form a "U" shape. The ends of the "U" bracket are then ground to fit on the 2" pipe and welded in place. These steel saddles are then held on the roll bar with hose clamps with a piece of sheet rubber in between to prevent scratches if you have chrome. These steel saddles are extremely strong and will not move if a hose clamp is placed on each side of the saddle.
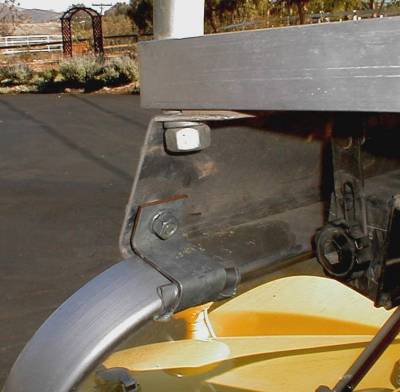
Front Mounting Detail
To assemble all the parts of the rack, first mount the front support rail to the windshield. Then use hose clamps to loosely attach the saddles to the roll bar. Next, set the front of the pan on top of the support rail and set the rear of the pan on the saddle brackets. The two holes in the front of the pan that are used to mount the rack frame will also be used to connect to the front support rail. Center the pan on the mounts and then mark the front rail where the holes must be drilled. Drill two holes in the rear of the pan to bolt the pan to the saddle brackets. The rack frame can now be bolted to the pan and front rail. The saddles can be bolted to the rear of the pan and the hose clamps tightened securely.
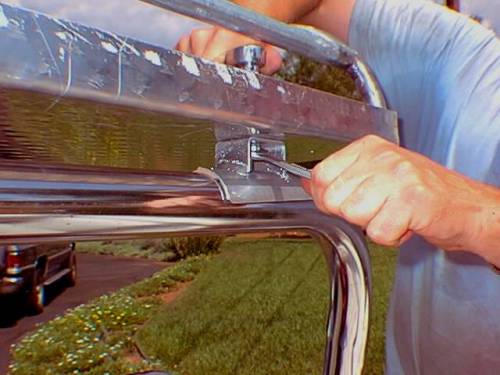
Bolting to Rear Saddle Mount
The finished rack actually makes the buggy stronger by stiffening the windshield frame. The dash and hood are held tightly in position and no longer flex. I regularly carry over 200 lbs. on my rack to Baja and back without causing any problems. I have had 500 lbs. on the rack to carry the Manx Dune Buggy Club's lunch and drinks to remote picnic spots. The rack also functions as a roof and sunshade which can be easily removed in less than 10 minutes.
Sun Mar 5 2:00 PDT 2000
